Estimated Read Time: 15 min
Next.js Authentication with Auth0
Understanding Authentication in Next.js: A Deep Dive
Authentication is a crucial aspect of web development, ensuring that only authorized users can access protected resources within your application. In the context of Next.js, a popular React framework, understanding how authentication works is essential for building secure and reliable web applications.
Next.js provides a versatile environment for building both client-side and server-side rendered applications. When it comes to authentication, Next.js offers various approaches, including client-side authentication using libraries like Auth0 and server-side authentication with session management.
In a Next.js application, authentication typically involves:
- User Login: Implementing a user login functionality where users can securely authenticate themselves using credentials such as username/email and password.
- User Profile Management: Once authenticated, users may need access to their profile information and settings. This includes displaying user details, managing account settings, and handling profile updates.
- Access Control: Ensuring that certain parts of the application are accessible only to authenticated users. This involves implementing authorization checks to restrict access to specific routes or features.
- Authentication State Management: Managing the authentication state of users throughout their session. This includes handling login/logout actions, persisting authentication tokens, and maintaining user sessions.
To achieve these goals in a Next.js application, integrating a robust authentication solution like Auth0 is a popular choice. Auth0 provides a comprehensive platform for authentication and authorization, offering features such as social login, multi-factor authentication, and user management out of the box.
By leveraging Auth0 in Next.js applications, developers can streamline the authentication process, enhance security, and provide a seamless user experience. In the following sections, we'll explore how to configure Auth0 for your Next.js app, implement login and user profile features, and discuss best practices for building secure authentication systems in Next.js.
Secure User Authentication with Auth0 in Next.js
Auth0 is a leading authentication and authorization platform that simplifies the process of adding secure user authentication to web and mobile applications. When it comes to Next.js, integrating Auth0 provides a powerful solution for implementing authentication features quickly and efficiently.
Configuring Auth0 for Your Next.js App
Before diving into the implementation details, you'll need to set up an Auth0 account and configure your Next.js application to work with Auth0. Here's a step-by-step guide:
- Create an Auth0 Account: Start by signing up for an Auth0 account if you haven't already. Auth0 offers a free tier with generous usage limits, making it easy to get started.
- Set Up an Auth0 Application: Once logged in to your Auth0 dashboard, create a new application for your Next.js project. This application will represent your Next.js app within the Auth0 ecosystem.
- Configure Application Settings: Customize your Auth0 application settings according to your requirements. This includes specifying allowed callback URLs, logout URLs, and other authentication-related configurations.
- Obtain Auth0 Credentials: After configuring your Auth0 application, you'll receive unique credentials such as Client ID and Client Secret. These credentials will be used to authenticate your Next.js application with Auth0.
- Install Auth0 SDK: Next, install the Auth0 SDK for Next.js in your project. You can do this using npm or yarn:
npm install @auth0/nextjs-auth0 # or yarn add @auth0/nextjs-auth0
6.** Configure Auth0 SDK **
Once installed, configure the Auth0 SDK in your Next.js app by providing your Auth0 credentials and other necessary configurations. This typically involves creating a .env.local file to store sensitive information like Client ID and Client Secret.
# .env.local
AUTH0_DOMAIN=your-auth0-domain
AUTH0_CLIENT_ID=your-auth0-client-id
AUTH0_CLIENT_SECRET=your-auth0-client-secret
AUTH0_REDIRECT_URI=http://localhost:3000/api/auth/callback
AUTH0_POST_LOGOUT_REDIRECT_URI=http://localhost:3000/
7.Initialize Auth0 SDK: Finally, initialize the Auth0 SDK in your Next.js app to enable authentication features such as login, logout, and user profile management.
With Auth0 configured in your Next.js app, you're ready to start implementing secure user authentication features. In the next section, we'll explore how to add login and user profile functionality to your Next.js application using Auth0.
Adding Login and User Profile Features to Your Next.js Application
Once you've configured Auth0 for your Next.js app, the next step is to add login and user profile features. This involves creating login pages, handling authentication callbacks, and displaying user information after successful login.
Implementing Login Page
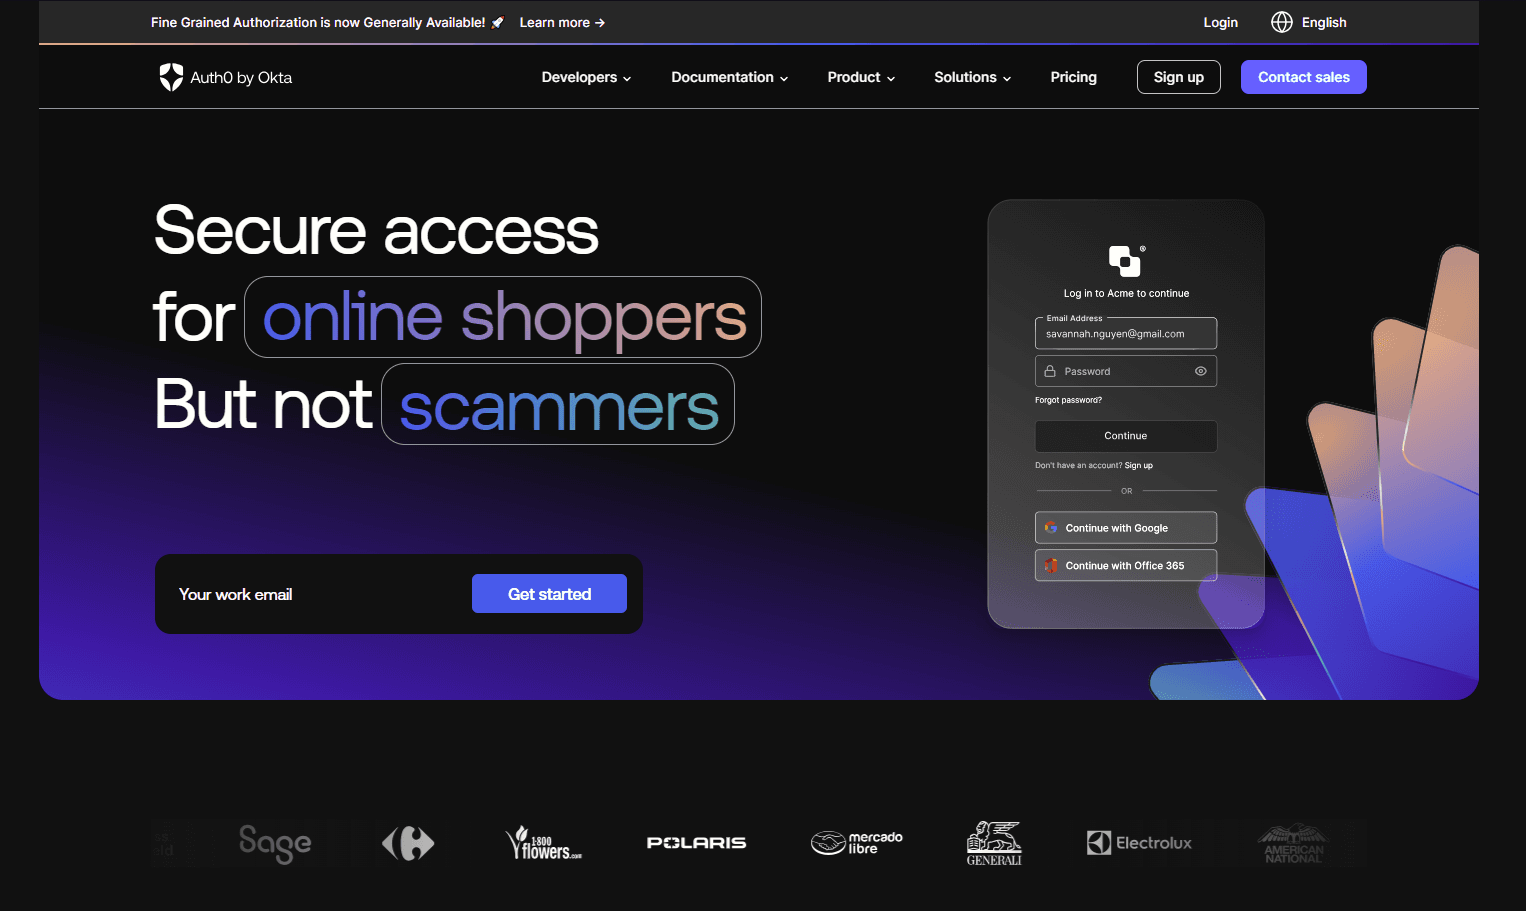
To create a login page in your Next.js app, you can use the Auth0 Universal Login Page. This is a customizable authentication page provided by Auth0, where users can enter their credentials and authenticate themselves.
Here's how you can implement a basic login page using the Auth0 Universal Login Page:
- Create a Login Component: Start by creating a login component in your Next.js app. This component will contain the login form and handle the authentication process.
// components/Login.js
import React from 'react';
import { useUser } from '@auth0/nextjs-auth0';

const Login = () => {
  const { user, error, isLoading } = useUser();

  if (isLoading) {
    return <div>Loading...</div>;
  }

  if (error) {
    return <div>{error.message}</div>;
  }

  if (user) {
    return <div>You are already logged in as {user.name}</div>;
  }

  return (
    <div>
      <h1>Login</h1>
      <button onClick={() => loginWithRedirect()}>Log In</button>
    </div>
  );
};

export default Login;
In this component, we use the useUser hook provided by the Auth0 SDK to check the authentication status. If the user is already logged in, we display a welcome message. Otherwise, we render a login button that redirects the user to the Auth0 Universal Login Page upon clicking.
2.Integrate Login Component
Next, integrate the login component into your Next.js application. You can add it to your page components or create a dedicated login route.
// pages/login.js
import Login from '../components/Login';

const LoginPage = () => {
  return <Login />;
};

export default LoginPage;
By creating a login.js page in the pages directory and importing the login component, you can access the login functionality at the /login route of your Next.js app.
Handling Authentication Callbacks
After a successful authentication, Auth0 will redirect the user back to your Next.js application with an authentication token. You'll need to handle this callback to complete the authentication process.
// pages/api/auth/callback.js import { handleAuth } from '@auth0/nextjs-auth0'; export default handleAuth();
This code snippet creates an API route in your Next.js app (/api/auth/callback) to handle authentication callbacks. The handleAuth function provided by the Auth0 SDK takes care of processing the authentication callback and updating the user authentication state accordingly.
Displaying User Profile Information
Once the user is authenticated, you may want to display their profile information on your Next.js application. You can fetch user details from the authentication token provided by Auth0 and render them accordingly.
// components/Profile.js
import React from 'react';
import { useUser } from '@auth0/nextjs-auth0';

const Profile = () => {
  const { user, error, isLoading } = useUser();

  if (isLoading) {
    return <div>Loading...</div>;
  }

  if (error) {
    return <div>{error.message}</div>;
  }

  if (!user) {
    return <div>You are not logged in.</div>;
  }

  return (
    <div>
      <h1>Welcome, {user.name}!</h1>
      <p>Email: {user.email}</p>
      <p>Picture: <img src={user.picture} alt="Profile Picture" /></p>
      <button onClick={() => logout({ returnTo: window.location.origin })}>Log Out</button>
    </div>
  );
};

export default Profile;
This component fetches the user's profile information using the useUser hook and renders it on the page. It also provides a logout button to allow users to log out of their session.
By integrating the login, authentication callback handling, and profile components into your Next.js application, you can provide a seamless authentication experience for your users.
Exploring Auth0 Application Settings in Next.js
Auth0 offers a wide range of application settings that allow you to customize the authentication flow, security policies, and user experience. In this section, we'll explore some of the key Auth0 application settings and how they can be configured for your Next.js app.
Allowed Callback URLs
Allowed callback URLs specify the URLs where Auth0 redirects users after authentication. In a Next.js application, you'll need to whitelist the callback URL for the authentication callback API route.
# .env.local AUTH0_CALLBACK_URL=http://localhost:3000/api/auth/callback
Make sure to update the AUTH0_CALLBACK_URL environment variable with the correct callback URL for your Next.js app.
Logout URLs
Logout URLs determine where users are redirected after logging out of your application. You can specify the logout URL in your Auth0 application settings to ensure users are redirected back to your Next.js app after logging out.
# .env.local AUTH0_LOGOUT_URL=http://localhost:3000/
Update the AUTH0_LOGOUT_URL environment variable with the appropriate logout URL for your Next.js app.
Allowed Web Origins
Allowed web origins define the origins from which Auth0 can accept authentication requests. Ensure that your Next.js application's origin is whitelisted in your Auth0 application settings to prevent unauthorized authentication requests.
# .env.local AUTH0_DOMAIN=https://your-nextjs-app.vercel.app
Replace https://your-nextjs-app.vercel.app with the actual origin of your Next.js application.
Identity Providers
Auth0 supports various identity providers (e.g., Google, Facebook, GitHub) for social login and third-party authentication. You can configure identity provider settings in your Auth0 dashboard to enable social login in your Next.js app.
Rules and Hooks
Auth0 rules and hooks allow you to execute custom logic during the authentication process. You can use rules to enforce additional security measures, customize user profiles, or integrate with external services.
By exploring and configuring these Auth0 application settings, you can tailor the authentication flow to suit your Next.js application's requirements and enhance security.
In the next section, we'll discuss different authentication strategies for Next.js pages and API routes and how to implement them using Auth0.
Authentication Strategies for Next.js Pages and API Routes
In a Next.js application, authentication needs may vary depending on whether you're securing client-side rendered pages or server-side rendered pages/API routes. Let's explore some common authentication strategies for Next.js and how to implement them using Auth0.
Client-Side Authentication (CSR)
Client-side authentication is suitable for securing routes and components that are rendered on the client-side. This approach involves verifying the user's authentication status in the browser and rendering different UI components based on that status.
// components/Navbar.js
import React from 'react';
import { useUser } from '@auth0/nextjs-auth0';

const Navbar = () => {
  const { user, isLoading } = useUser();

  return (
    <nav>
      <ul>
        <li><a href="/">Home</a></li>
        {user ? (
          <>
            <li><a href="/profile">Profile</a></li>
            <li><a href="/api/logout">Logout</a></li>
          </>
        ) : (
          <li><a href="/api/login">Login</a></li>
        )}
      </ul>
    </nav>
  );
};

export default Navbar;
In this example, the Navbar component conditionally renders different navigation links based on the user's authentication status. If the user is logged in, it displays links to the profile page and logout endpoint. Otherwise, it shows a login link.
Server-Side Authentication (SSR)
Server-side authentication is suitable for securing routes and API endpoints that require server-side processing. This approach involves verifying the user's authentication status on the server and returning appropriate responses based on that status.
// pages/api/protected.js
import { withApiAuthRequired } from '@auth0/nextjs-auth0';

export default withApiAuthRequired(function handler(req, res) {
  res.status(200).json({ message: 'This is a protected API route.' });
});
In this example, the /api/protected endpoint is protected using the withApiAuthRequired higher-order function provided by the Auth0 SDK. This ensures that only authenticated users can access the endpoint.
API Routes Authentication
Next.js API routes allow you to create serverless functions that handle HTTP requests. You can authenticate these API routes using middleware functions provided by the Auth0 SDK to ensure that only authenticated users can access them.
// pages/api/profile.js
import { getSession } from '@auth0/nextjs-auth0';

export default async function handler(req, res) {
  const { user } = getSession(req, res);

  if (!user) {
    res.status(401).json({ message: 'Unauthorized' });
    return;
  }

  res.status(200).json({ user });
}
In this example, the /api/profile endpoint fetches the user's profile information from the session using the getSession function provided by the Auth0 SDK. If the user is not authenticated, it returns a 401 Unauthorized response.
By implementing these authentication strategies in your Next.js application, you can ensure that your routes and endpoints are protected against unauthorized access, providing a secure environment for your users.
In the next section, we'll explore how to leverage the Auth0 Next.js SDK for seamless authentication and user management in your Next.js app.
Leveraging Auth0 Next.js SDK for Seamless Authentication
The Auth0 Next.js SDK provides a set of utilities and hooks that streamline the authentication process and enable seamless integration with Auth0 in Next.js applications. Let's explore some key features of the Auth0 Next.js SDK and how to leverage them in your Next.js app.
Authentication Hooks
The Auth0 Next.js SDK offers a set of authentication hooks that simplify user authentication and session management in Next.js applications. These hooks allow you to access user authentication state, perform login/logout actions, and fetch user profile information with minimal boilerplate code.
// pages/profile.js
import React from 'react';
import { useUser } from '@auth0/nextjs-auth0';

const ProfilePage = () => {
  const { user, error, isLoading } = useUser();

  if (isLoading) {
    return <div>Loading...</div>;
  }

  if (error) {
    return <div>{error.message}</div>;
  }

  if (!user) {
    return <div>You are not logged in.</div>;
  }

  return (
    <div>
      <h1>Welcome, {user.name}!</h1>
      <p>Email: {user.email}</p>
      <p>Picture: <img src={user.picture} alt="Profile Picture" /></p>
    </div>
  );
};

export default ProfilePage;
In this example, the useUser hook provided by the Auth0 Next.js SDK is used to fetch the user's authentication state and profile information. Depending on the authentication status, the appropriate UI is rendered.
Authentication Provider
The Auth0 Next.js SDK includes an authentication provider component that manages the authentication state of your Next.js app and provides access to authentication-related functionalities across your application.
// pages/_app.js
import { Auth0Provider } from '@auth0/nextjs-auth0';

function MyApp({ Component, pageProps }) {
  return (
    <Auth0Provider
      domain={process.env.NEXT_PUBLIC_AUTH0_DOMAIN}
      clientId={process.env.NEXT_PUBLIC_AUTH0_CLIENT_ID}
      redirectUri={process.env.NEXT_PUBLIC_AUTH0_REDIRECT_URI}
    >
      <Component {...pageProps} />
    </Auth0Provider>
  );
}

export default MyApp;
In this example, the Auth0Provider component wraps the root component of your Next.js app and provides authentication context to all child components. Make sure to provide the Auth0 domain, client ID, and redirect URI as environment variables.
Authentication Guard
The Auth0 Next.js SDK offers an authentication guard higher-order function that protects routes and ensures that only authenticated users can access them.
// pages/profile.js
import { withPageAuthRequired } from '@auth0/nextjs-auth0';

const ProfilePage = () => {
  // Rendered only if user is authenticated
  return (
    <div>
      <h1>Profile Page</h1>
      {/* Profile content */}
    </div>
  );
};

export default withPageAuthRequired(ProfilePage);
In this example, the withPageAuthRequired higher-order function protects the ProfilePage component, ensuring that it's only rendered for authenticated users. Unauthorized users will be redirected to the login page.
By leveraging the Auth0 Next.js SDK, you can simplify authentication workflows, enhance security, and provide a seamless user experience in your Next.js application.
In the next section, we'll explore how Next.js server-side rendering (SSR) can be combined with authentication to build secure and performant web applications.
Next.js Server-Side Rendering and Authentication
Next.js offers powerful server-side rendering capabilities that allow you to pre-render pages on the server and deliver optimized HTML to clients. When combined with authentication, server-side rendering can enhance security and performance by ensuring that sensitive data is not exposed during the initial page load.
Server-Side Authentication Flow
In a Next.js application with server-side rendering, the authentication flow typically involves fetching user authentication status and data on the server and passing it to the client-side for rendering. This ensures that sensitive information is processed securely on the server and only relevant data is sent to the client.
// pages/profile.js
import { getSession } from '@auth0/nextjs-auth0';

export async function getServerSideProps(context) {
  const { req, res } = context;
  const session = await getSession(req, res);

  if (!session || !session.user) {
    return {
      redirect: {
        destination: '/login',
        permanent: false,
      },
    };
  }

  return {
    props: {
      user: session.user,
    },
  };
}

const ProfilePage = ({ user }) => {
  return (
    <div>
      <h1>Welcome, {user.name}!</h1>
      <p>Email: {user.email}</p>
      <p>Picture: <img src={user.picture} alt="Profile Picture" /></p>
    </div>
  );
};

export default ProfilePage;
In this example, the getServerSideProps function fetches the user's session data on the server and redirects unauthorized users to the login page. If the user is authenticated, their profile information is passed to the ProfilePage component for rendering.
Secure Data Fetching
Server-side rendering allows you to fetch sensitive data securely on the server and pass it to the client-side without exposing it to potential security risks. This ensures that only authenticated users can access protected resources and sensitive information is not leaked during the initial page load.
// pages/profile.js
import { getSession } from '@auth0/nextjs-auth0';

export async function getServerSideProps(context) {
  const { req, res } = context;
  const session = await getSession(req, res);

  if (!session || !session.user) {
    return {
      redirect: {
        destination: '/login',
        permanent: false,
      },
    };
  }

  const userProfile = await fetchUserProfile(session.user.sub);

  return {
    props: {
      user: session.user,
      profile: userProfile,
    },
  };
}

const ProfilePage = ({ user, profile }) => {
  return (
    <div>
      <h1>Welcome, {user.name}!</h1>
      <p>Email: {user.email}</p>
      <p>Profile: {profile.bio}</p>
    </div>
  );
};

export default ProfilePage;
In this example, the getServerSideProps function fetches the user's profile data from a secure backend API endpoint and passes it to the ProfilePage component for rendering. This ensures that only authenticated users can access the profile information, and sensitive data is handled securely on the server.
By combining Next.js server-side rendering with authentication, you can build secure, performant web applications that deliver a seamless user experience.
In the next section, we'll discuss how to build an Auth0-protected Next.js app and explore best practices for integrating Auth0 authentication into your Next.js projects.
Building an Auth0-Protected Next.js App
Building an Auth0-protected Next.js app involves integrating Auth0 authentication and authorization features into your Next.js application to secure routes, authenticate users, and manage user sessions. Let's explore the steps to build an Auth0-protected Next.js app and ensure a seamless authentication experience for your users.
Setting Up Auth0 Integration
The first step is to set up Auth0 integration in your Next.js application by configuring Auth0 application settings, installing the Auth0 Next.js SDK, and initializing the Auth0 provider.
npm install @auth0/nextjs-auth0
// pages/_app.js
import { Auth0Provider } from '@auth0/nextjs-auth0';

function MyApp({ Component, pageProps }) {
  return (
    <Auth0Provider
      domain={process.env.NEXT_PUBLIC_AUTH0_DOMAIN}
      clientId={process.env.NEXT_PUBLIC_AUTH0_CLIENT_ID}
      redirectUri={process.env.NEXT_PUBLIC_AUTH0_REDIRECT_URI}
    >
      <Component {...pageProps} />
    </Auth0Provider>
  );
}

export default MyApp;
In this example, the Auth0Provider component is used to wrap the root component of your Next.js app and provide authentication context to all child components. Make sure to provide the Auth0 domain, client ID, and redirect URI as environment variables.
Adding Authentication Routes
Next, you'll need to add authentication routes to your Next.js application for handling user login, logout, and authentication callbacks.
// pages/api/auth/[...auth0].js
import { handleAuth } from '@auth0/nextjs-auth0';

export default handleAuth();
In this example, the [...auth0].js API route handles authentication callbacks from Auth0. It uses the handleAuth function provided by the Auth0 Next.js SDK to process authentication requests and update the user authentication state accordingly.
Protecting Routes
Once Auth0 integration is set up, you can protect routes in your Next.js application to ensure that only authenticated users can access them.
// pages/profile.js
import { withPageAuthRequired } from '@auth0/nextjs-auth0';

const ProfilePage = () => {
  return (
    <div>
      <h1>Profile Page</h1>
      {/* Profile content */}
    </div>
  );
};

export default withPageAuthRequired(ProfilePage);
In this example, the withPageAuthRequired higher-order function protects the ProfilePage component, ensuring that it's only rendered for authenticated users. Unauthorized users will be redirected to the login page.
By following these steps, you can build an Auth0-protected Next.js app that provides secure authentication features and a seamless user experience.
In the final section, let's discuss some best practices for integrating Auth0 authentication into your Next.js projects and ensuring the security and reliability of your applications.
Best Practices: Next.js, Auth0, and User Authentication
When integrating Auth0 authentication into your Next.js projects, it's essential to follow best practices to ensure the security, reliability, and maintainability of your applications. Here are some best practices to consider:
-
Secure Environment Variables: Store sensitive information such as Auth0 credentials and API keys in environment variables and avoid hardcoding them in your codebase. Use tools like dotenv or Vercel environment variables to manage environment-specific configurations.
-
Implement Access Control: Implement access control measures to restrict access to certain routes, components, or features based on user roles and permissions. Use Auth0 rules or custom authorization logic to enforce access control policies.
-
Enable Multi-Factor Authentication (MFA): Enable multi-factor authentication (MFA) to add an extra layer of security to your authentication process. Auth0 provides built-in support for various MFA methods, including SMS, email, and authenticator apps.
-
Monitor Authentication Events: Monitor authentication events and user activity to detect suspicious behavior or security threats. Utilize Auth0 logging and monitoring features to track authentication attempts, failed logins, and other security-related events.
-
Keep Dependencies Updated: Regularly update dependencies, including the Auth0 Next.js SDK and other third-party libraries, to patch security vulnerabilities and ensure compatibility with the latest features and improvements.
-
Implement Rate Limiting: Implement rate limiting and throttling mechanisms to prevent brute-force attacks and protect your authentication endpoints from abuse. Use tools like Auth0 anomaly detection or API gateway rate limiting features to enforce rate limits.
-
Educate Users on Security: Educate users on best practices for password security, account protection, and recognizing phishing attempts. Provide guidance on creating strong passwords, enabling MFA, and verifying the authenticity of login prompts.
By following these best practices, you can build secure, reliable Next.js applications with Auth0 authentication and provide a safe environment for your users to interact with your application.
In conclusion, Next.js authentication with Auth0 offers a powerful solution for implementing secure user authentication features in Next.js applications. By understanding authentication concepts, configuring Auth0 integration, and following best practices, you can build robust, secure, and user-friendly web applications with Next.js.